Unlock Luminous Lips: The Magic of DIY Honey & Coconut Oil Lip Gloss
Tired of lip glosses that leave your pout feeling sticky, yet still dry? Imagine a luscious, all-natural alternative that not only provides an enviable shine but also deeply nourishes and protects your delicate lip skin. With a simple blend of ingredients from your pantry, you can create a truly transformative lip product. This article will guide you through crafting your very own DIY citrus honey lip gloss, a homemade wonder that promises hydration, a delightful aroma, and a non-sticky finish you’ll adore.
The beauty of making your own lip gloss lies in its simplicity and the power to control every ingredient. Say goodbye to parabens, artificial fragrances, and unknown chemicals. Instead, embrace the potent natural benefits of honey, coconut oil, and invigorating citrus essential oils. Not only is this recipe incredibly easy to follow, but it also offers a superior moisturizing experience, leaving your lips softer and smoother with every application. Ready to transform your lip care routine?
The Science of Softness: Why Honey and Coconut Oil Reign Supreme
When it comes to natural lip care, few ingredients rival the efficacy of honey and coconut oil. This dynamic duo forms the backbone of our exceptional homemade lip gloss, each bringing unique benefits that contribute to soft, supple, and healthy lips.
Honey: Nature's Humectant and Healer
Honey isn't just a sweetener; it's a skincare superhero. For your lips, its primary superpower is being a natural humectant. This means it actively attracts moisture from the air and locks it into your skin, providing intense and long-lasting hydration. If you've ever suffered from chapped or dry lips, you know the discomfort. Honey works wonders to soothe and repair, helping to heal cracks and restore smoothness. Beyond its hydrating prowess, honey also offers a natural, subtle sheen to your lip gloss, enhancing its overall appeal without feeling heavy.
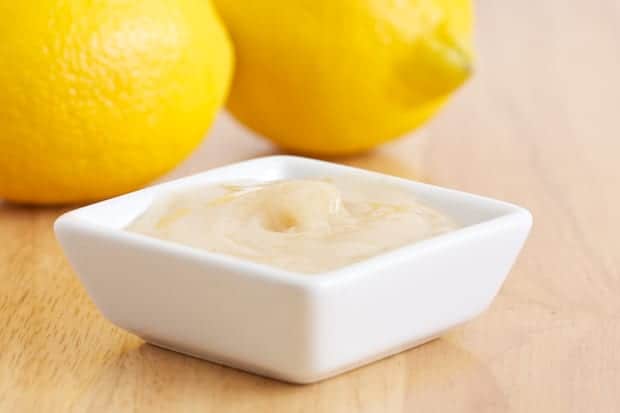
Coconut Oil: Deep Nourishment and a Silky Base
Virgin coconut oil forms the moisturizing base of our DIY Citrus Honey Lip Gloss: Easy Steps for Soft, Non-Sticky Lips. Renowned for its deep penetrating moisturizing abilities, coconut oil is rich in fatty acids that nourish the skin barrier, preventing moisture loss and protecting against environmental stressors. Unlike many commercial lip glosses that can feel greasy or superficially shiny, coconut oil provides a lasting softness that truly improves the condition of your lips over time. It helps create a lip gloss that glides on smoothly, offering all the desired glossiness without the notorious stickiness often associated with store-bought products. Using a high-quality, raw coconut oil will ensure you get the maximum benefit from its natural properties.
Beeswax: The Secret to Structure and Longevity
While honey and coconut oil are the stars for hydration, beeswax plays a crucial supporting role. It's what gives your lip gloss its structure, preventing it from melting too easily, especially in warmer temperatures. Beeswax also acts as a protective barrier on your lips, sealing in moisture without clogging pores. When combined with coconut oil, it helps create that perfect non-sticky texture, ensuring your gloss feels comfortable and lasts longer on your lips. If you're tired of grating beeswax blocks, you'll be happy to know it's now widely available in convenient bead form, making your DIY process even smoother.
Citrus Essential Oils: A Burst of Freshness and Wellness
To elevate your Make Your Own Non-Sticky Honey Lip Gloss with Citrus Oils, adding a few drops of high-quality essential oil is a game-changer. While you can choose any essential oil you love, citrus varieties like lemon, orange, grapefruit, or lime are particularly popular for this recipe. They infuse the gloss with an uplifting, fresh aroma that can boost your mood, and some even offer mild astringent or cleansing properties. Just be sure to use reputable, skin-safe essential oils, and remember that a little goes a long way.
Your Crafting Journey: Step-by-Step DIY Citrus Honey Lip Gloss
Creating your own natural lip gloss is a rewarding experience that takes mere minutes. Here’s how to whip up your perfect batch of DIY citrus honey lip gloss:
Ingredients You'll Need:
- 2 tablespoons raw coconut oil: Opt for raw or virgin varieties for maximum nutrient content.
- 1 tablespoon grated beeswax (or beeswax pellets/beads): Beads are easier to measure and melt.
- 1 teaspoon raw honey: Local raw honey is often praised for its purity and benefits.
- 10-15 drops of citrus essential oil: Lemon, grapefruit, sweet orange, or a blend are fantastic choices. Adjust to your scent preference.
Equipment:
- Small saucepan or a heat-safe glass bowl (for double boiler method)
- Spoon or spatula for stirring
- Small whisk
- Small bowl for an ice bath
- Clean, airtight containers for your finished lip gloss (e.g., small pots, tins, or empty lip gloss tubes).
The Crafting Process:
- Gentle Melting: Combine the coconut oil, beeswax, and honey in your small saucepan or heat-safe bowl. Place it over very low heat. If using a double boiler, place the bowl over a pot of simmering water. The key here is to keep the heat as low as possible to preserve the beneficial properties of the raw ingredients. Stir gently until the beeswax is completely dissolved and the mixture is uniform. This usually takes only a few minutes.
- Crucial Emulsification: Once everything is melted and well combined, immediately remove the saucepan/bowl from the heat. Place it into a small ice bath (a larger bowl filled with ice water). This rapid cooling step is vital!
- Whisk to Perfection: Begin whisking the mixture continuously for about 1 minute. As it cools, you'll notice it starting to thicken and turn opaque. This whisking action helps to emulsify the honey with the coconut oil and beeswax, ensuring a smooth, consistent texture and preventing separation later. It's what makes your lip gloss glossy and non-sticky!
- Infuse with Citrus: Once the mixture has thickened but is still liquid enough to pour, remove it from the ice bath. Add your chosen citrus essential oil(s) and whisk again thoroughly to ensure the oil is evenly distributed.
- Transfer and Set: Quickly pour the warm, liquid lip gloss into your clean, prepared containers. Work relatively fast, as it will continue to thicken as it cools. Fill them to your desired level, leaving a little room at the top.
- Final Chill (Optional): Allow your lip gloss to cool completely at room temperature or place it in the refrigerator for 10-15 minutes to speed up the setting process. Once fully set, it will have a solid, balm-like consistency in the pot, but will melt into a beautiful gloss on your lips.
Beyond the Basics: Customizing Your Homemade Lip Gloss
The beauty of DIY extends to customization. While the base recipe for this DIY citrus honey lip gloss is phenomenal on its own, you can easily personalize it:
- Tinted Lips: For a subtle hint of color, add a tiny pinch of cosmetic-grade mica powder (use sparingly, as too much can make it gritty), a small piece of an old lipstick, or even a tiny amount of beet root powder for a natural pink hue during the melting phase.
- Alternative Scents: If citrus isn't your preferred aroma, experiment with other essential oils like peppermint (for a plumping sensation), lavender (for soothing), or even a touch of vanilla extract (add after melting, with essential oils).
- Extra Nourishment: Consider adding a few drops of vitamin E oil (a natural antioxidant and preservative) or a dash of shea butter for even more intense hydration, especially in dry climates.
Longevity and Care: Maximizing Your Natural Lip Gloss
Your homemade DIY citrus honey lip gloss is a fresh product, and proper storage will help maximize its shelf life. Stored in a cool, stable room temperature environment, it should last for approximately 6 months. In very hot climates, you might find it softens more quickly, in which case refrigeration could extend its life. Always ensure your containers are clean and airtight to prevent contamination and maintain freshness. Applying it with clean fingers or a dedicated lip brush will also help keep your gloss pristine.
You’ll notice that this lip gloss provides lasting softness and smoothness, often absorbed into the lips within an hour, leaving them deeply moisturized. For even longer wear or a more protective base, consider applying it over your favorite natural lip balm or chapstick. This creates an extra layer that helps the gloss adhere longer, delivering continuous hydration and shine.
Making your own lip gloss is a delightful journey into natural beauty. This DIY citrus honey lip gloss recipe offers a non-sticky, deeply moisturizing, and aromatically pleasing alternative to commercial products. It's simple, effective, and allows you to nurture your lips with pure, wholesome ingredients. So, gather your supplies, follow these easy steps, and prepare to flaunt a naturally radiant, hydrated smile!
