DIY Citrus Honey Lip Gloss: Your Guide to Soft, Non-Sticky Perfection
Tired of lip glosses that promise shine but deliver an annoying, sticky mess? Imagine a lip gloss that not only provides a beautiful, glossy finish but also deeply nourishes your lips with natural ingredients, all while smelling incredibly fresh and uplifting. The good news is, you don't need to break the bank or compromise on quality to achieve this. With our easy-to-follow guide, you can create your very own DIY citrus honey lip gloss right at home, transforming your lip care routine into a simple, luxurious, and completely natural experience.
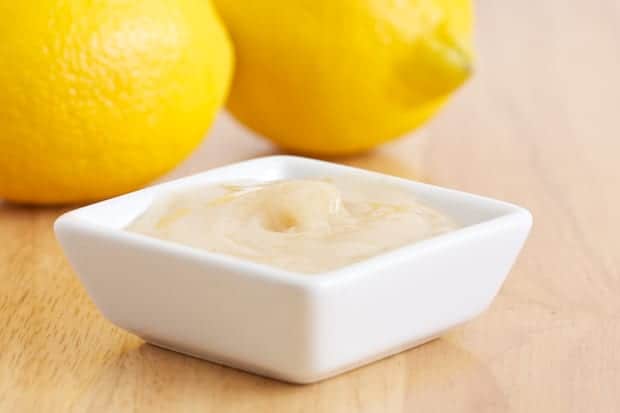
Crafting your own beauty products puts you in control of what goes onto your skin. This particular recipe focuses on harnessing the moisturizing power of raw honey, the deep hydration of coconut oil, and the protective qualities of beeswax, all uplifted by the invigorating aroma of citrus essential oils. The result? A perfectly glossy, wonderfully soft, and delightfully non-sticky lip treatment that will leave your lips feeling pampered for hours.
Why Choose DIY Citrus Honey Lip Gloss? Unveiling the Natural Benefits
Opting for a homemade lip gloss isn't just a fun project; it's a conscious choice for healthier, happier lips. When you create your own DIY citrus honey lip gloss, you're embracing nature's best ingredients, free from parabens, synthetic fragrances, and preservatives often found in commercial products. Let's delve into the powerhouse ingredients that make this lip gloss a must-try.
The Magic of Honey: A Natural Elixir for Your Lips
Honey isn't just a sweet treat; it's a skincare marvel, especially for your lips. Its primary benefit lies in its nature as a humectant. This means honey actively attracts and retains moisture from the air, drawing it into your lips and keeping them hydrated for longer. For anyone prone to chapped or dry lips, this property is invaluable, aiding in healing and preventing further dryness. Beyond its moisturizing capabilities, honey contributes a beautiful, natural shine to your lip gloss, enhancing its visual appeal while providing a protective, soothing layer. To maximize these benefits, we highly recommend using raw, unpasteurized honey, which retains all its natural enzymes and antioxidants.
Coconut Oil: Your Deeply Moisturizing Base
At the heart of our non-sticky lip gloss formula is coconut oil, chosen for its exceptional moisturizing properties. Unlike many ingredients that merely sit on the surface, coconut oil provides deeper, more sustained hydration, making your lips feel soft and smooth for extended periods. It forms a protective barrier, locking in moisture without feeling greasy or heavy. Furthermore, its natural emollient qualities are key to achieving that coveted glossiness without the inherent stickiness commonly associated with commercial glosses. Just like honey, opting for raw or virgin coconut oil ensures you're utilizing the purest form with the highest concentration of beneficial fatty acids.
Beeswax: The Secret to Structure and Non-Stickiness
To give your lip gloss structure, prevent it from melting too easily, and truly nail that non-sticky texture, beeswax is indispensable. Beeswax acts as a natural emulsifier and thickener, binding the oils and honey together while providing a gentle firmness. It also creates a breathable protective layer on your lips, shielding them from environmental elements like wind and cold without clogging pores. For convenience, beeswax is readily available in small pastilles or beads, eliminating the need to grate it from a block – a small tip that can save you time and effort in your DIY journey!
Citrus Essential Oils: A Burst of Freshness and Upliftment
What sets this particular recipe apart is the invigorating inclusion of citrus essential oils. From the bright zest of lemon and sweet orange to the tangy freshness of grapefruit or lime, these oils not only impart a delightful aroma but also offer a sensory boost. Lemon essential oil, for instance, is known for its uplifting properties, while grapefruit can be wonderfully refreshing. When incorporating essential oils, always ensure they are high-quality, pure, and safe for topical application. A general rule of thumb for lip products is to keep the concentration low, typically around 1-2% of the total volume, to ensure safety and avoid irritation. This natural scent profile elevates your lip gloss experience, making each application a moment of pure bliss. For more insights into natural lip care, consider reading our article on Make Your Own Non-Sticky Honey Lip Gloss with Citrus Oils.
Gathering Your Essentials: Ingredients for Your DIY Citrus Honey Lip Gloss
Before you embark on your lip gloss creation journey, ensure you have all the necessary ingredients and tools. This recipe is designed for simplicity, making it perfect for beginners and seasoned DIY enthusiasts alike.
What You'll Need:
- 2 tablespoons raw coconut oil: The hydrating foundation.
- 1 tablespoon grated beeswax (or beeswax beads): For structure and non-stickiness.
- 1 teaspoon raw honey: The natural humectant and shine booster.
- 10-15 drops citrus essential oil: Choose your favorite—lemon, grapefruit, sweet orange, or a blend.
- Optional: A tiny pinch of cosmetic-grade mica powder for a subtle shimmer or tint.
Essential Equipment:
- A small, heat-safe saucepan or a double boiler setup.
- A small whisk or fork.
- A small bowl for an ice bath.
- Clean, empty lip gloss tubes or small cosmetic pots for storage. Sterilizing these beforehand is crucial for product longevity.
Step-by-Step Guide: Crafting Your Perfect Non-Sticky Lip Gloss
Creating your own DIY citrus honey lip gloss is a straightforward process that takes just minutes. Follow these steps carefully to achieve the perfect consistency and effectiveness.
Preparation & Melting: Gentle Heat is Key
- Combine Ingredients (Excluding Essential Oil): In your small saucepan or the top of a double boiler, combine the 2 tablespoons of raw coconut oil, 1 tablespoon of grated beeswax, and 1 teaspoon of raw honey.
- Melt on Low Heat: Place the saucepan over very low heat. The goal here is to gently melt the beeswax and coconut oil without overheating the raw honey, which can degrade its beneficial properties. Stir continuously until the beeswax is completely dissolved and all ingredients are thoroughly combined into a clear liquid. This typically takes only a few minutes. Avoid microwaving if you want to maintain the 'raw' benefits of your ingredients, as microwaves can apply uneven and intense heat.
The Emulsification Process: Key to Non-Stickiness
- Prepare an Ice Bath: Once all ingredients are melted and thoroughly mixed, immediately remove the saucepan from the heat.
- Whisk Over Ice: Carefully place the bottom of the saucepan into a small ice bath (a bowl filled with ice and a little water). Begin to whisk the mixture vigorously for about one minute. This step is absolutely critical! The rapid cooling combined with whisking forces the honey to emulsify with the oils and wax. Without this process, the honey and oils might separate as they cool, leading to a gritty or sticky texture. Emulsification ensures a smooth, uniform, and non-sticky lip gloss that holds its consistency. You'll notice the mixture beginning to thicken and turn opaque.
Infusing with Citrus & Final Transfer
- Add Essential Oils: As the mixture thickens but is still pliable (after about a minute of whisking over ice), add your 10-15 drops of chosen citrus essential oil. If using mica powder for tint, add it now as well. Whisk again briefly to ensure the essential oil and any optional tints are evenly distributed throughout the now thickening gloss.
- Transfer to Containers: While the mixture is still soft and pourable, quickly transfer your freshly made lip gloss into your clean, empty lip gloss tubes or cosmetic pots. If the mixture sets too quickly, you can gently re-warm it over very low heat for a few seconds to make it pourable again.
- Cool and Set: Allow the lip gloss to cool completely and solidify at room temperature for several hours before using.
Tips for Longevity, Customization, and Maximizing Benefits
Now that you've mastered the art of making your own DIY citrus honey lip gloss, here are some additional insights to help you get the most out of your creation.
Storage and Shelf Life
Your homemade lip gloss, being free of synthetic preservatives, has a natural shelf life. Stored in stable room temperatures, it should remain fresh and effective for up to 6 months. In warmer climates or during hot spells, its lifespan might be slightly shorter, as heat can cause ingredients to degrade faster. To ensure maximum freshness and potency, consider making smaller batches more frequently. Always use clean applicators to avoid introducing bacteria into your product, which can shorten its shelf life.
Enhancing Application for Extended Wear
While your citrus honey lip gloss provides significant hydration and shine, you can extend its wear time and benefits even further. Applying it over a base of your favorite natural lip balm or chapstick can create an additional barrier, helping to lock in the gloss and moisture, and keeping your lips softer for a longer duration. This layering technique is particularly effective in harsh weather conditions. If you're looking for another great natural option, check out our guide on Hydrate Lips Naturally: DIY Honey & Coconut Oil Lip Gloss.
Unleashing Your Creativity: Customization Ideas
The beauty of DIY is the endless possibility for customization. Once you're comfortable with the basic DIY citrus honey lip gloss recipe, feel free to experiment:
- Different Essential Oils: While citrus oils are fantastic for their uplifting scent, consider other lip-safe essential oils. A drop of peppermint can create a subtle plumping effect, while lavender offers soothing properties. Always research safe dilution rates for any new oil.
- Natural Tints: For a touch of color, incorporate natural powders. A tiny pinch of beetroot powder can yield a beautiful rosy hue, while cocoa powder can add a subtle brownish tint. Start with a very small amount and add more gradually until you achieve your desired shade.
- Alternative Carrier Oils: While coconut oil is excellent, you could experiment with other nourishing carrier oils like sweet almond oil or jojoba oil, keeping in mind that these might slightly alter the final texture and absorption rate of your gloss.
The Raw Ingredient Advantage
We've emphasized using raw coconut oil and raw honey throughout this guide for a reason. Raw ingredients retain a higher concentration of their natural vitamins, enzymes, and antioxidants, which are crucial for optimal skin health. By keeping the heat low during the melting process, you help preserve these precious compounds, ensuring your lip gloss is not just a cosmetic but a potent treatment for your lips.
Conclusion
Crafting your own DIY citrus honey lip gloss is more than just a beauty hack; it's an empowering step towards natural self-care. With simple ingredients and a few easy steps, you can create a luxurious, non-sticky, and deeply moisturizing lip treatment that truly pampers your lips. Say goodbye to sticky glosses and hello to a radiant, healthy pout, infused with the fresh, uplifting scent of citrus. Give your lips the natural care they deserve and enjoy the incredible benefits of homemade beauty!
